If you are having trouble installing Redis on your Windows machine, you have come to the right spot. In this brief guide, I’ll show you step-by-step how to install Redis easily on your Windows system. First, let’s see what is Redis and what you can do with it.
In this tutorial, we’ll discuss:
What is Redis?
Redis, or Remote Dictionary Server, is an open-source, in-memory data structure store. It is commonly used as a caching, messaging, and real-time analytics database due to its excellent performance, versatility, and flexibility. Redis is well-known for its speed and capacity to handle a wide range of data types, making it an ideal choice for modern web applications and distributed systems.
Redis is a key-value store, with each key mapped to a value. However, it supports many data formats, including strings, hashes, lists, sets, sorted sets, bitmaps, hyperlogs, and geospatial indexes. This versatility enables developers to model a diverse range of data patterns efficiently.
Redis Core capabilities
- In-Memory Storage: Redis stores data primarily in RAM, which makes read and write operations fast.
- Persistence: Even Redis is an in-memory database, you can still have data persistence. With Redis, data may be saved to disk either periodically or upon certain events, that way data can be recovered if needed in case of failures.
- Replication: For consistency reasons, allows you to create multiple instances of your dataset which is possible due to redundancy and fault tolerance.
- Partitioning: Redis supports data partitioning, allowing large datasets to be distributed across multiple Redis instances, thereby improving scalability and performance.
- Pub/Sub Messaging: Redis includes built-in support for publish/subscribe messaging, allowing clients to subscribe to channels and receive messages published to those channels in real time. This feature is useful for building real-time chat applications, notification systems, and event-driven architectures.
- Lua Scripting: To provide atomicity and efficiency in transactions, developers can write custom scripts to execute on the server side within Redis instances.
- Atomic Operations: Redis provides atomic operations on its data types, ensuring that operations such as increments, decrements, and list manipulations are performed atomically and consistently, even in concurrent environments.
- Cluster Support: Redis includes built-in support for clustering, allowing multiple Redis nodes to be connected to form a distributed Redis cluster. This feature enables horizontal scaling and high availability by automatically redistributing data and load across cluster nodes.
These core capabilities make Redis a powerful and versatile tool for building high-performance, scalable, and real-time applications.
Install Redis
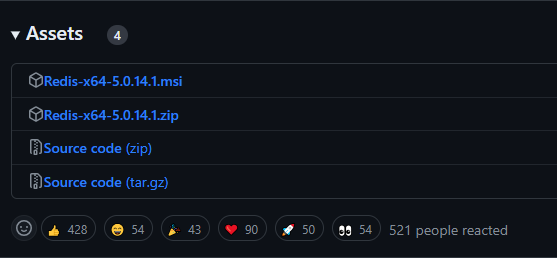
In order to install Redis, you should first download the msi package from this GitHub repository Once the download is completed, open the package from your directory. Follow the installation wizard it is pretty straightforward.
Verifying Redis Installation
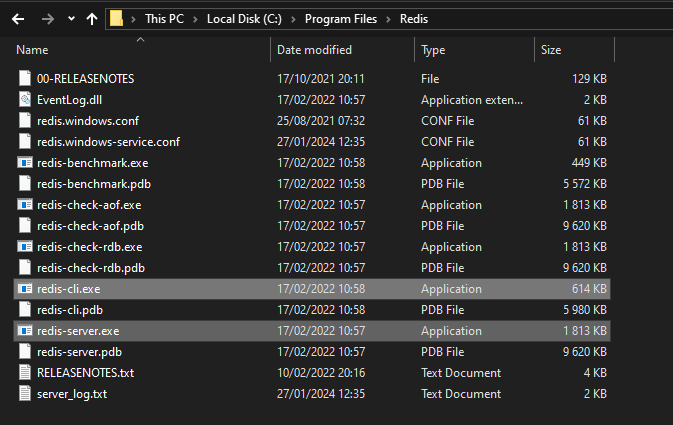
After the installation is finished, navigate to your installation folder through your C drive, typically C:\Program Files\Redis. From this folder, we need two files: redis-cli.exe and redis-server.exe. The former is used to interact with our database, and the latter is used to launch the Redis server. However, you can only directly open the redis-cli.exe file from this folder.
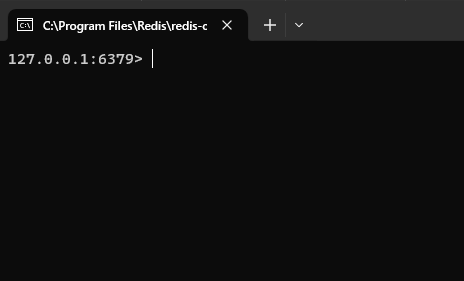
If everything works as expected, you should see a screen like the following when you open redis-cli.exe.
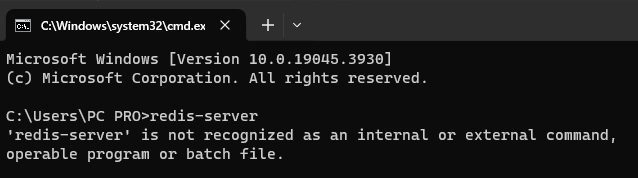
Though Redis is successfully installed on our system, there is still a caveat. As developers, we usually don’t navigate to the installation path of a program to run it; instead, we use the command-line interface (CLI). However, if you try to run redis-server from the CLI, you’ll get an error saying that the command is not recognized. To solve this issue, we need to add the path of the Redis installation files to the system’s environment variables.
Adding Redis Path to Environment Variables
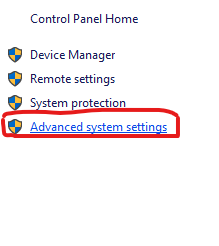
To add Redis to the environment variable, go to This PC make and right-click in an empty area and select properties.

Then, on the left hand of the window, click on Advanced sytem settings.
In the dialog box, select Environment Variables.

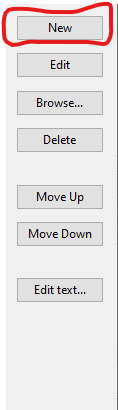
It should open another dialog box where you will actually add the path and double-click on Path.

In this area, click on the new button to add a new path.
The last step here is to add the following path C:\Program Files\Redis then click OK to close the dialog boxes.

Once you’ve completed all these steps, close the terminal window, open a new one and try to type redis-server again. You should see something like this.

And now, the redis-cli is also accessible from your terminal window.

Redis is now successfully installed on your system, and you can use any programming language library to access the Redis server. For example, you can use py-redis if you’re using Python.
I hope this tutorial has guided you through the installation process of Redis. If you found it helpful, please consider sharing this article on your social media page to help others.
</>