Creating your radio station may seem daunting, especially if you’re unfamiliar with the technical terminology. But fret not, as the internet age has made it much easier to turn your room into a buzzing radio hub with the help of Icecast – the streaming server superhero.
In this step-by-step tutorial, we will explain how to set up your online radio station using Icecast. We will cover everything from installation to configuration and beyond.
In this tutorial, we discuss:
What is Icecast?
Icecast is a powerful open-source streaming server that allows you to broadcast audio content online. It provides a flexible and customizable platform for setting up and managing your radio station.
How to Install Icecast?
The installation process for Icecast varies based on the operating system you are using. Therefore, this tutorial will provide instructions for some commonly used operating systems such, as Ubuntu, Debian, CentOS, and Microsoft Windows.
Installing Icecast on Ubuntu or Debian:
1. Update Package List:
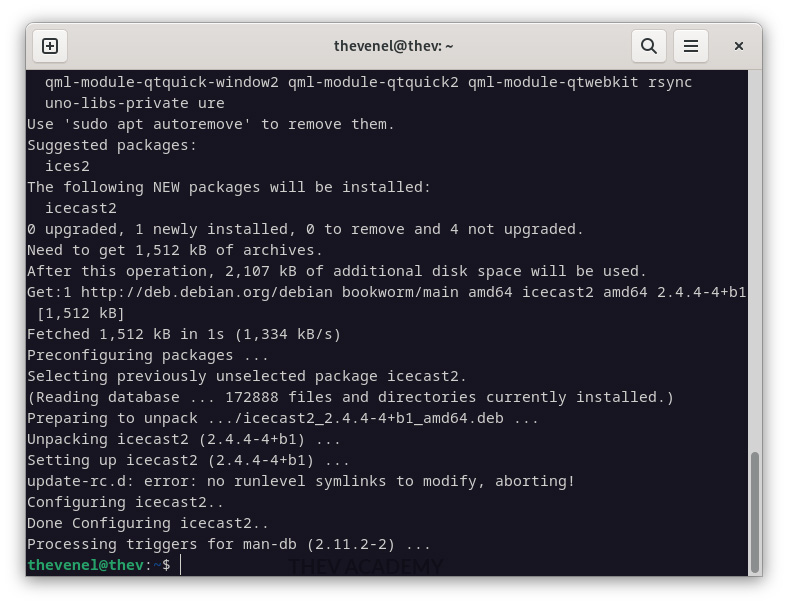
sudo apt-get update2. Install Icecast:
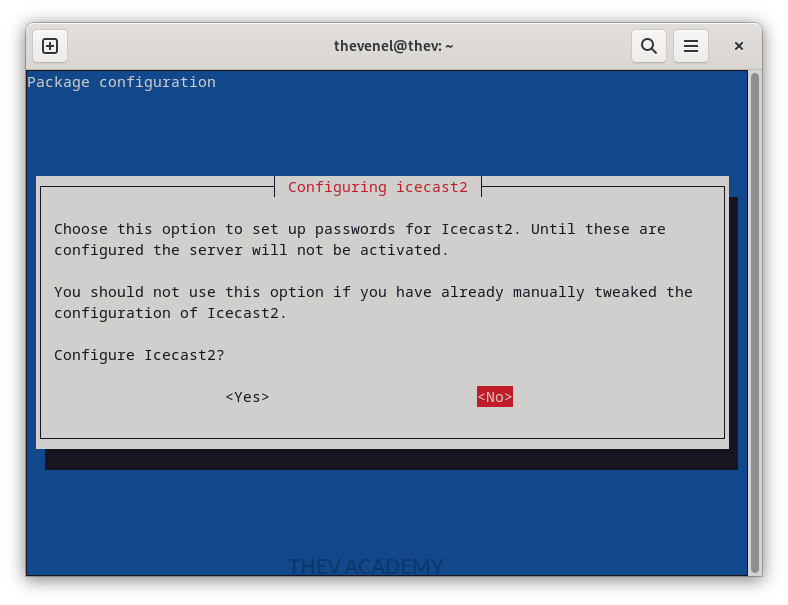
sudo apt-get install icecast2After executing the command, the installation wizard will prompt you to configure Icecast. You can configure it now or later when setting up your mount point. I selected “Yes,” but it does not matter now.
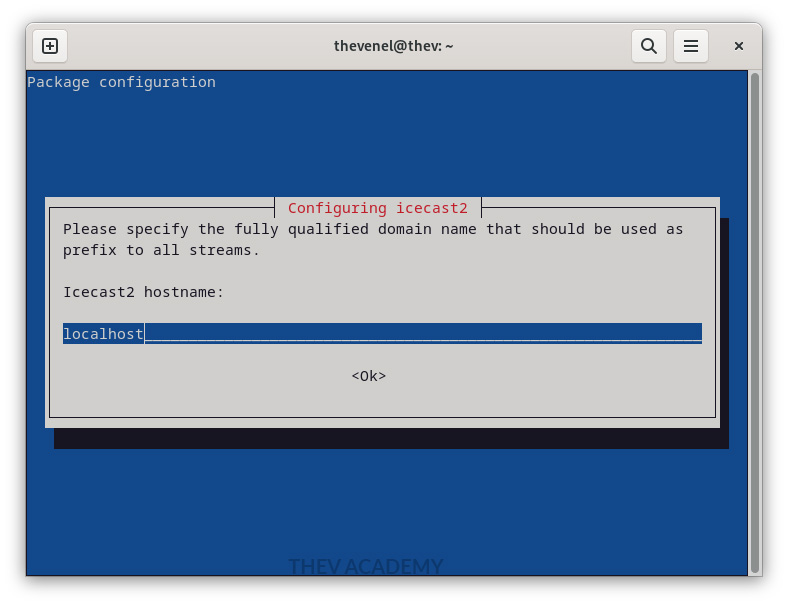
Next, you will be prompted to enter a hostname where the stream will be served. You can use your IP address or your website domain if you have one. In this tutorial, we will be using localhost, but you are free to adapt it according to your own situation.
Then, you need to set up a password that will be used by your stream client to connect to the Icecast server. Instead of the default password “hackme“, it is recommended to choose a more secure one.

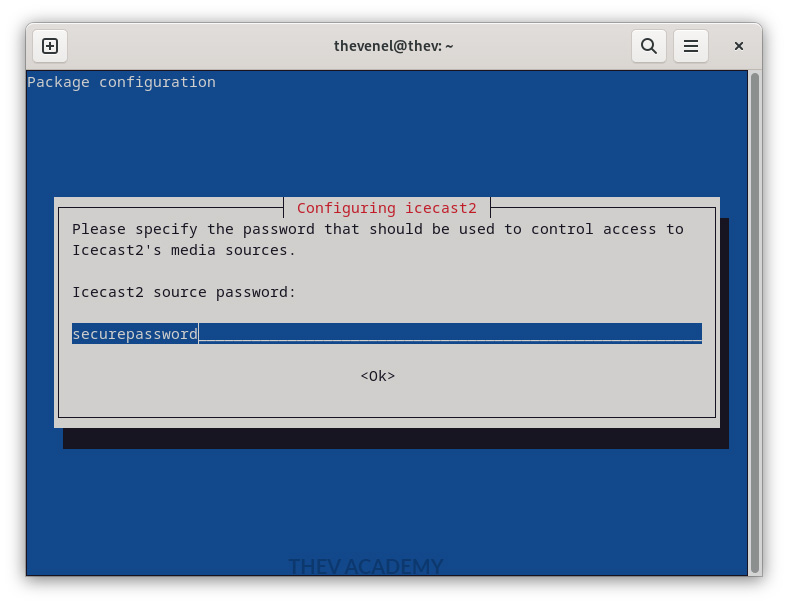
Obviously, this step is crucial as it gives you complete control over your streams. In fact, it is important to ensure that the password you choose is secure enough, as shown in the screenshot below.
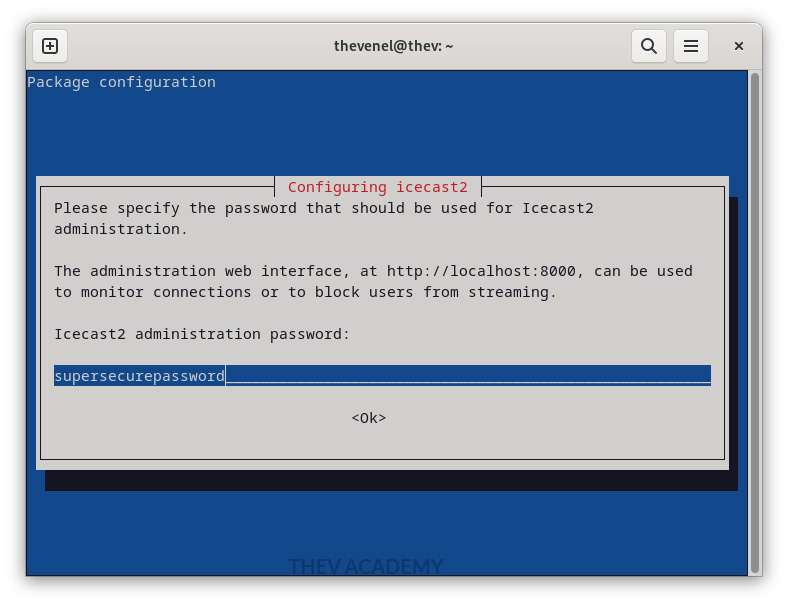
After the installation is finished, you will be able to see a screen that looks like the one below. Next, you will learn how to configure your Icecast server through its file configuration.
3. Configure Icecast:
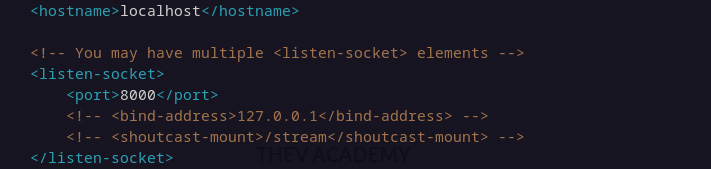
Although you can configure your hostname and your password alongside the installation, it is common to also make modifications when the installation is complete as mentioned earlier. Hence, the main configuration file for Icecast is located at /etc/icecast2/icecast.xml. Then, you can edit the file using nano by executing the following command.
sudo nano /etc/icecast2/icecast.xmlIn summary, this file contains everything related to your streaming server. Practically, you can modify everything according to your needs and purposes, including your admin user, your sources, and your relays. We’ll see only the most basic ones in this tutorial.
It is recommended to make a backup of this file prior to its modification as mentioned in its official documentation.
To start, the hostname is the most important section in the config file because it is the one people will use to connect to your stream. Also, you will need to provide a specific port for which your stream will be served. By default, the port is 8000.
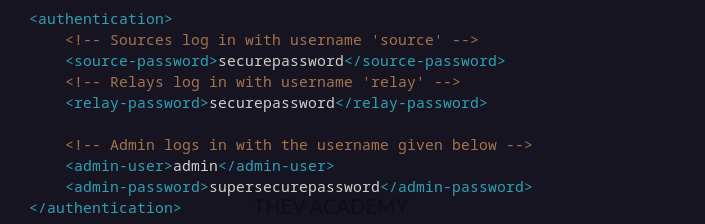
Secondly, the <authentication> this block is basically where you modify your user admin, your source, and relay passwords.
Finally, you can specify a mount point by uncommenting the <shoutcast-mount> tag, if it is not provided, the default one is /stream. In the example below, you will need to use live.nsv as the mount point in your broadcasting software.

4. Restart Icecast:
After making changes to the configuration, restart the Icecast service:
sudo systemctl restart icecast25. Check Icecast configuration:
You can also see the Icecast server status by entering:
systemctl status icecast2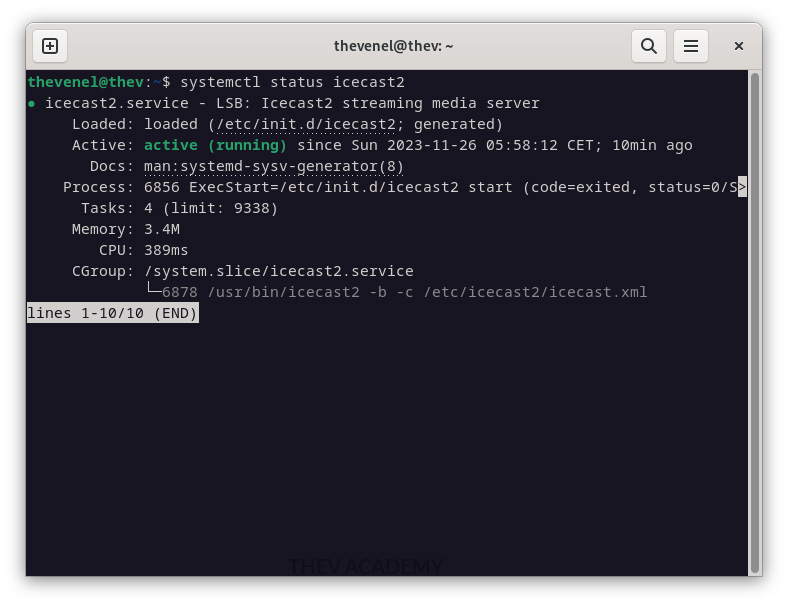
If you see anything different from the previous screenshot, verify if followed all the instructions properly.
6. Test Icecast:
If everything works as expected, when enter localhost:8000 in your browser you should see something like this.
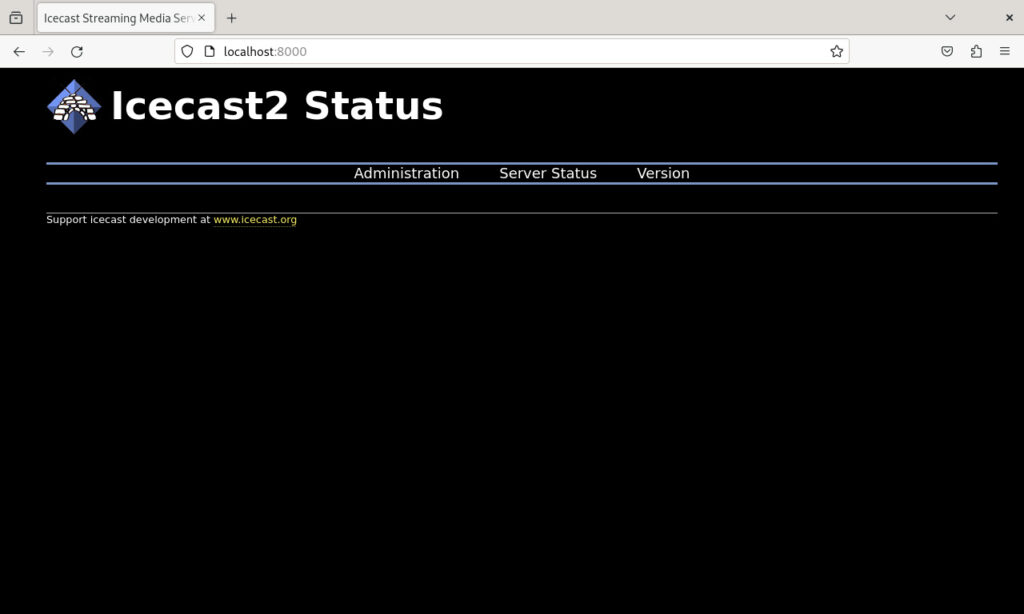
Congratulations! Your server is well-configured. Get yourself a snack and be ready for the next step which is installing and configuring your stream.
Installing Icecast on CentOS:
1. Enable EPEL Repository:
sudo yum install epel-release2. Install Icecast:
sudo yum install icecast3. Configure Icecast:
Edit the Icecast configuration file located at /etc/icecast.xml.
sudo nano /etc/icecast.xmlAdjust the configuration according to your needs, setting <hostname> to your server’s IP or domain, and configure authentication.
4. Start Icecast:
Start the Icecast service and enable it to start on boot:
sudo systemctl start icecast sudo systemctl enable icecastInstalling Icecast on Windows:
On Windows, the installation is pretty straightforward. However, some features might not be available because most Icecast features, such as SSL certificates are only available on Linux.
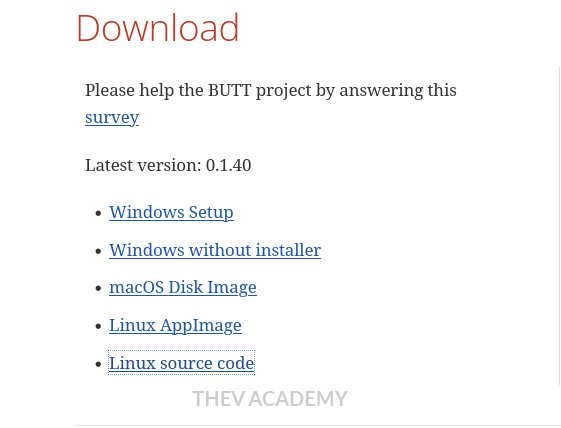
1. Download Installer: Download the Icecast installer for Windows from the official Icecast website: Icecast Downloads
2. Run Installer: Locate the installer on your computer, usually in your Downloads Folder, run the installer, and follow the on-screen instructions to install Icecast.
3. Configure Icecast: The configuration file is typically located at C:\Program Files (x86)\Icecast\icecast.xml. Edit this file according to your preferences.
4. Start Icecast: Start the Icecast service. You might find an “Icecast2” service in the Windows Services Manager. Alternatively, you can start Icecast from the command line:
net start icecast2Or through start > apps > Run Icecast (Console)
What is BUTT (Broadcasting Using This Tool)?
Butt is a cross-platform streaming tool that allows you to stream on Shoutcast, Icecast, and Radio.co (on Windows). While it is NOT able to stream audio files of any kind, you can use any software on your computer to stream your music or use your microphone as input in line to your streaming server. Furthermore, you can record your live session using butt, which makes it suitable for Podcasts or any rediffusion program on your website.
How to Install Butt?
Installing BUTT is quite easy. Firstly, you need to go to the official website or use your favorite search engine to download it. If you choose the first option, you can simply choose your operating system in the download section to get the installer.
Once the download is complete, launch the installer and follow the instructions on the screen wizard.
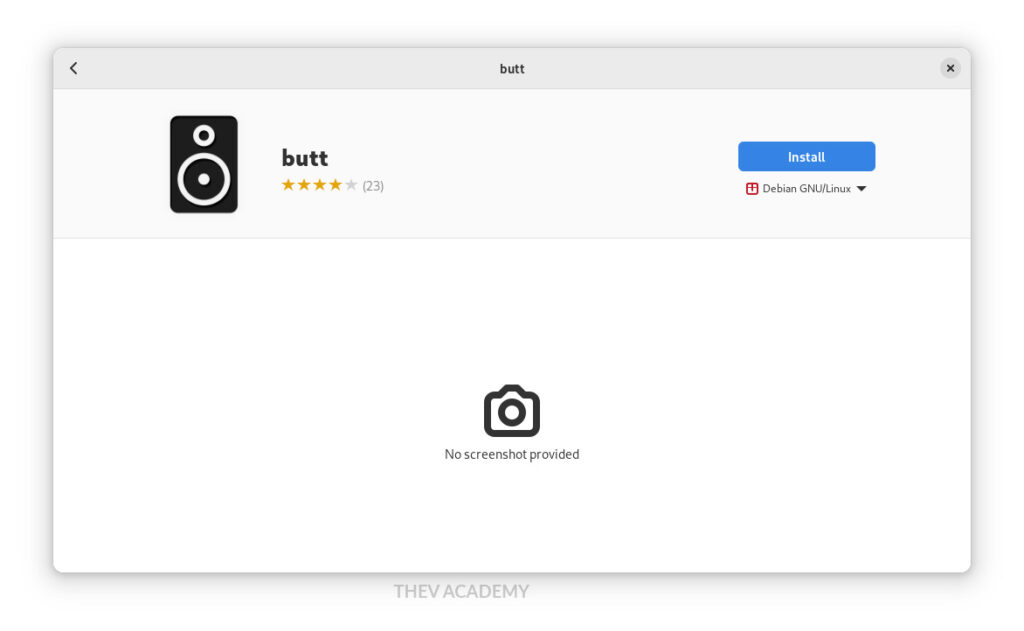
Alternatively, if you use Debian on Gnome, you can open your software store and search for butt. Select butt in the list and click the install button.
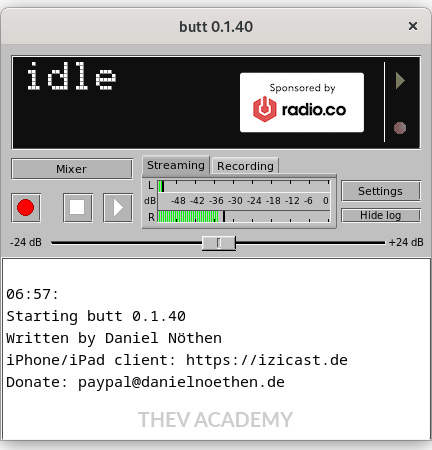
Once the installation is completed, run the app, and let’s configure our stream.
How to connect BUTT with your Icecast Server?
Certainly, you have both Icecast and Butt install. Following, let’s make some configurations to connect them. Firstly, you need to add your server information by clicking on the settings button on the main screen.
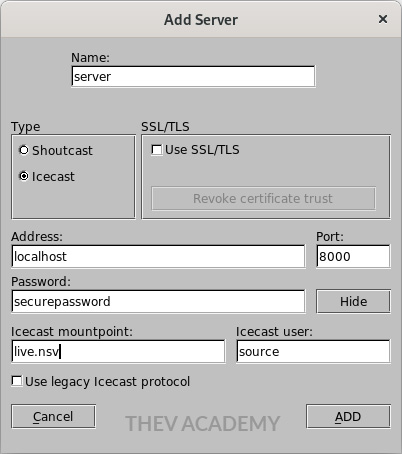
When the window opens, click on Add Server then fill in the fields according to your Icecast configuration file. In the window, you have to select your server type (Icecast), enter your hostname (localhost) and the port number (8000), and enter your source password. Make sure you enter the correct mount point if you changed it, the default user for Icecast is source. When you finish click add.
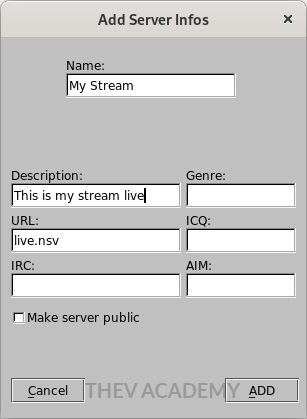
Optionally, you can provide some information about your stream by clicking on the Add Stream button.
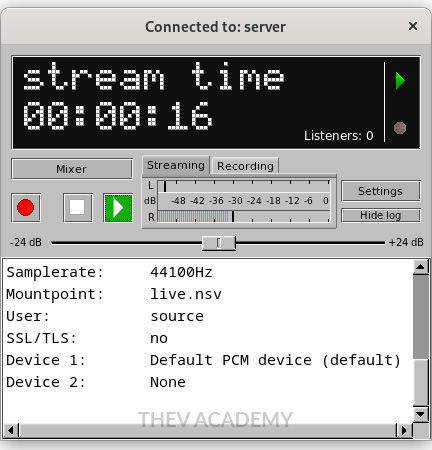
Additionally, You can choose which Audio device you wish to use as a primary and secondary input. Also, you can set up your codec, your recording directory, etc. After setting up everything, all you have to do is click on the play button on the main screen.
Hence, if you go to localhost:8000 in your browser, you should see something like this.
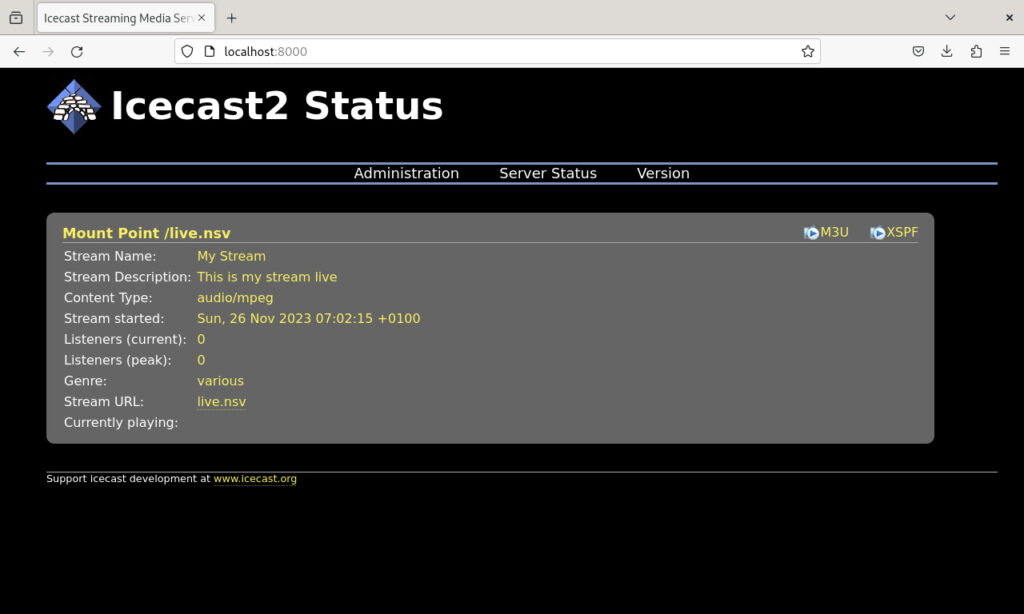
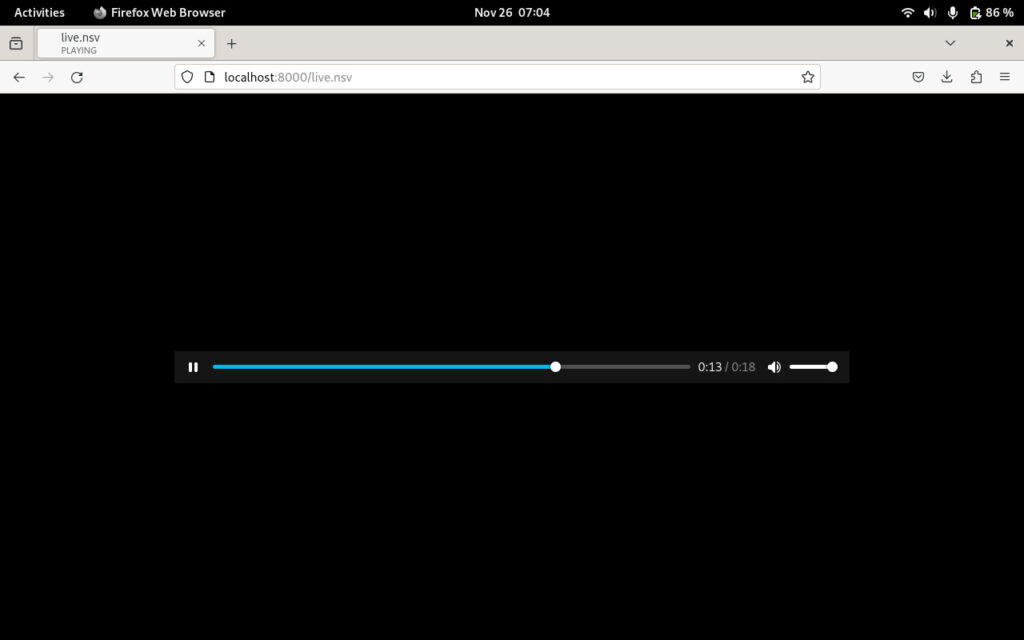
Then by clicking on the stream URL or by adding my mount point to the URL in the address bar, like localhost:8000/live.nsv, I should see my stream is playing.
Now that the connection is successful, you play everything you want on your computer and it will be served on your streaming link.
Wrapping up
To wrap things up
- First, you learned how to install and configure Icecast on different operating systems such as Mac, Windows, and Linux.
- In addition, you learned how to configure Icecast to serve on a specific hostname and port, and create a custom mount point for your stream.
- Then, how to download and install Butt (Broadcasting Using This Tool) which is a tool to stream live audio from your computer to a particular server.
- To conclude, you learned how to configure butt to stream on your Icecast server.
I hope that this tutorial helps you to set up your online radio station successfully. Thank you for your time. If you have any questions, please feel free to leave them in the comment section below, and I will do my best to answer them. Additionally, if you have any suggestions or requests for a specific tutorial, please do not hesitate to contact us at hello@thev-academy.com.
</>